Getting Started with xAPI
Here's a quick guide to get you started with xAPI. Just three files, no LMS and no elearning editor required.

Think of this guide as more of a recipe than a comprehansive xAPI guide. I've distilled the seemingly compex world of xAPI down into as few steps as possible, so that you can get a feel for how it works from start to finish, before jumping into the more advanced theory.
This is a quick-start, practical guide so that you can see how xAPI works in it’s simplest form. Just two JavaScript files and a html file. No need for publishing or uploading Storyline files.

What you'll need
- Access to an LRS
- LRS Username (key)
- LRS Password (Secret)
- IDE or Text editor (such as VS Code)
- To be comfortable with editing JavaScript and HTML code.
The easiest free LRS I've found for testing is Veracity LRS. It's quick to get setup and access to the details you need.
Create the files
We need three files, index.html , xapi-logic.js (you can name this file anything you want) and finally, the xAPI wrapper from ADL. You can .git clone https://github.com/adlnet/xAPIWrapper/ or download it manually, and place them all in a folder.
Write the HTML
To get you set up quickly, I've written a simple html page for you to use. Copy and paste the following html into the index.html file and click save.
If you decide to write your own HTML, don't forget to link the script files in the body element.
<!DOCTYPE html>
<html lang="en">
  <head>
    <meta charset="UTF-8" />
    <meta http-equiv="X-UA-Compatible" content="IE=edge" />
    <meta name="viewport" content="width=device-width, initial-scale=1.0" />
    <title>xAPI - Hello World!</title>
  </head>
  <body>
    <script type="text/javascript" src="xapiwrapper.min.js"></script>
    <script type="text/javascript" src="xapi-logic.js"></script>
    <h1>Get and Send xAPI</h1>
    <div>
      <button id="send">Send Statement</button>
      <button id="query">Query LRS</button>
    </div>
    <style>
      body {
        background-color: #5a3a6d;
        box-sizing: border-box;
        color: white;
        font-family: monospace;
        display: flex;
        flex-flow: column;
        align-items: center;
        justify-content: center;
        height: 90vh;
      }
    </style>
  </body>
</html>
./index.html
Setting up the JavaScript file
Create the onload function
Now for the fun part, the JavaScript!
We're going to wrap our code in the onload function so that all of the buttons and other DOM Elements are loaded before we try to select them in JavaScript.
window.onload = () => {};Setup the config object
Inside the window.onload function, add the config object. See the example below.
This is where you'll need your username and password. Replace the username and password place holder with the information from your LRS in the LRS.io dashboard. You will also need to replace the endpoint url with the endpoint of your own LRS.
window.onload = () => {
  // config object
  const conf = {
    endpoint: "https://example.lrs.io/xapi/",
    auth: "Basic " + toBase64("username(key):password(secret)"),
    // example auth: "Basic " + toBase64("arron:ch9er34dhza")
  };
  // call function from the xapi wrapper to update the config with the info provided in the config object
  ADL.XAPIWrapper.changeConfig(conf);
};
./xapi-logic.js
Writing a statement and creating a send function
Send Statement Function
It's time to add the xAPI statement and wrap it in a function so that we can call this function when the Send Statement button is clicked.
The function is called sendStatement. When we call the sendStatement function we will pass in the verb, verbID, object and objectId that we want to use for our statement. This will then be sent to the LRS.
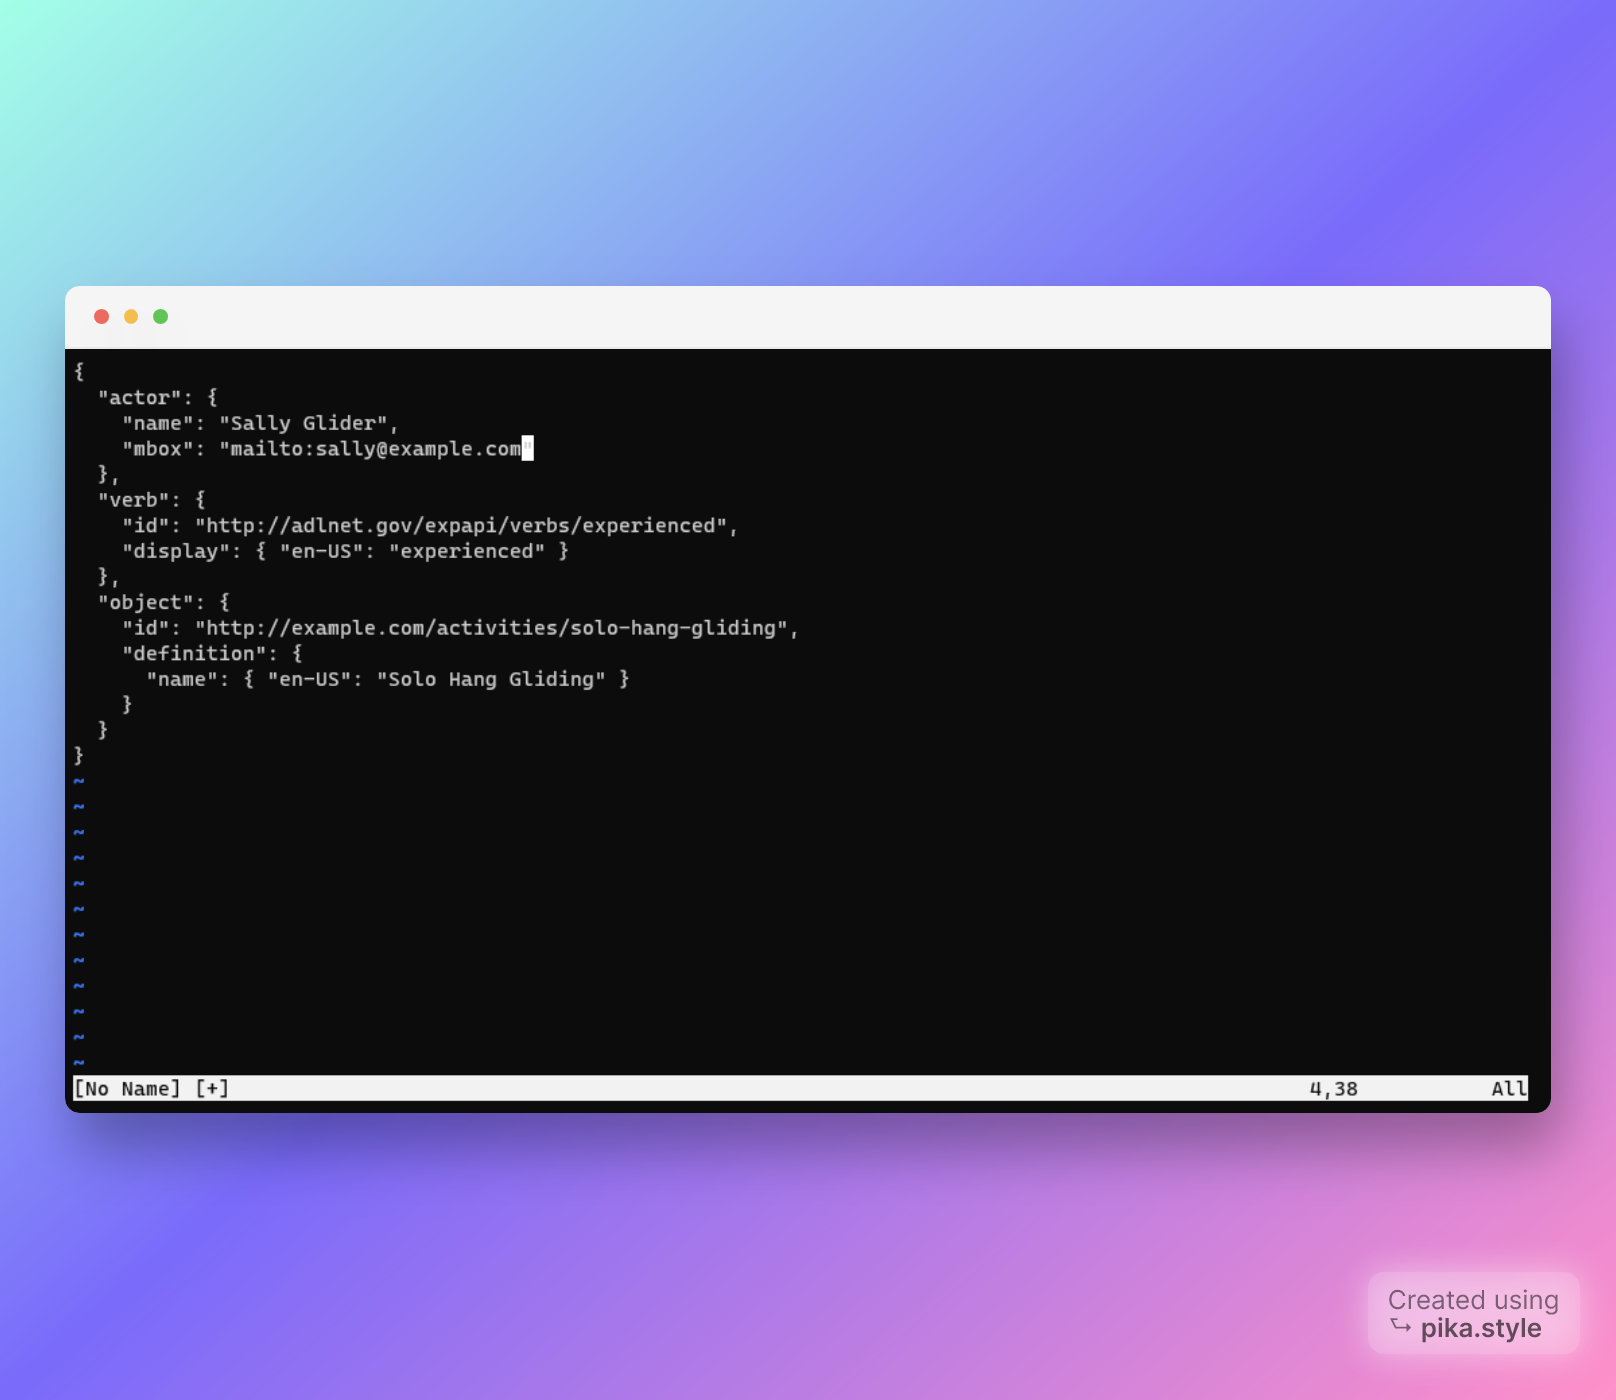
xAPI Statement
Inside sendStatement is a JavaScript object called statement. This a super simple example of an xAPI statement. I wont go into detail about how to structure these statements in this article, it is well documented in this guide. You can also use this handy tool to build statements.
xAPI sendStatement function
We also call the ADL.XAPIWrapper.sendStatement(statement); function here passing in the statement object. This wont be called immediately because we've wrapped it in our own function, so that we can call it when the button is clicked, more on that soon.
window.onload = () => {
  // config object
  const conf = {
    endpoint: "https://example.lrs.io/xapi/",
    auth: "Basic " + toBase64("username(key):password(secret)"),
    // example auth: "Basic " + toBase64("arron:ch9er34dhza")
  };
  // call function from the xapi wrapper to update the config with the info provided in the config object
  ADL.XAPIWrapper.changeConfig(conf);
};

// Function to send xAPI statement to LRS

function sendStatement(verb, verbId, object, objectId) {
  const statement = {
    actor: {
      name: "arron",
      mbox: "mailto:[email protected]",
    },
    verb: {
      id: verbId,
      display: { "en-US": verb },
    },
    object: {
      id: objectId,
      definition: {
        name: { "en-US": object },
      },
    },
  };
  ADL.XAPIWrapper.sendStatement(statement);
}
./xapi-logic.js
Sending the statement to the LRS
We're close to being able to send our first xAPI statement to the LRS 🥳, but first we need to let the browser know when to send it.
I've setup a button in the HTML you copied earlier so that we can trigger it when the user clicks the Send Statement button. Note this could be any trigger, you could call the function when the page loads, or when a question is answered for example. For now, we're keeping it simple. Add the code under // Trigger to call the function [...] and read through the comments for more detail on how this works.
window.onload = () => {
  // config object
  const conf = {
    endpoint: "https://example.lrs.io/xapi/",
    auth: "Basic " + toBase64("username(key):password(secret)"),
    // example auth: "Basic " + toBase64("arron:ch9er34dhza")
  };
  // call function from the xapi wrapper to update the config with the info provided in the config object
  ADL.XAPIWrapper.changeConfig(conf);
};

// Function to send xAPI statement to LRS

function sendStatement(verb, verbId, object, objectId) {
  const statement = {
    actor: {
      name: "arron",
      mbox: "mailto:[email protected]",
    },
    verb: {
      id: verbId,
      display: { "en-US": verb },
    },
    object: {
      id: objectId,
      definition: {
        name: { "en-US": object },
      },
    },
  };
  ADL.XAPIWrapper.sendStatement(statement);
}

// Trigger to call the function, which sends the xAPI statement to the LRS

const sendBtn = document.querySelector("#send"); // get the button

sendBtn.addEventListener("click", () => {
  // set the trigger with an event listener
  sendStatement(
    // call the sendStatement function and pass in the parameters (verb, verbID [...])
    "initialized",
    "http://example.com/verbs/initialized",
    "Solo Hang Gliding",
    "http://example.com/activities/hang-gliding"
  );
});
./xapi-logic.js
Send it 🚀
With this event listener added, you should now be able to load up the index.html and click the Send Statement button.
To check that this is working as expected, you can open the Browser Developer Tools, and click on the console tab.
If all is working you will see the XHR POST in the console (See first image in this article). You should also see the statement in your LRS! 🎉
Conclusion
That's it! When you click the query button, you should see the related XHR GET request and the response printed to the console. You can use the response variable to create other logic for your application.
There's lots more to learn, and a lot more you can do now you know how to send a statement to an LRS and then query the LRS, with the agent and activity parameters.
Don't forget, this was a quick start guide, light on the detail. Devlin Peck has a detailed article with examples of other parameters you can use to query the LRS.
You can also check the offical xAPI-Spec.