JavaScript to the Rescue: Managing Portrait Images in Storyline 360
Stop awkward cropping of tall images in Storyline 360. This guide shows how to use JavaScript for intuitive zoom and pan, making portrait photos fully interactive and easily viewable.

Use case
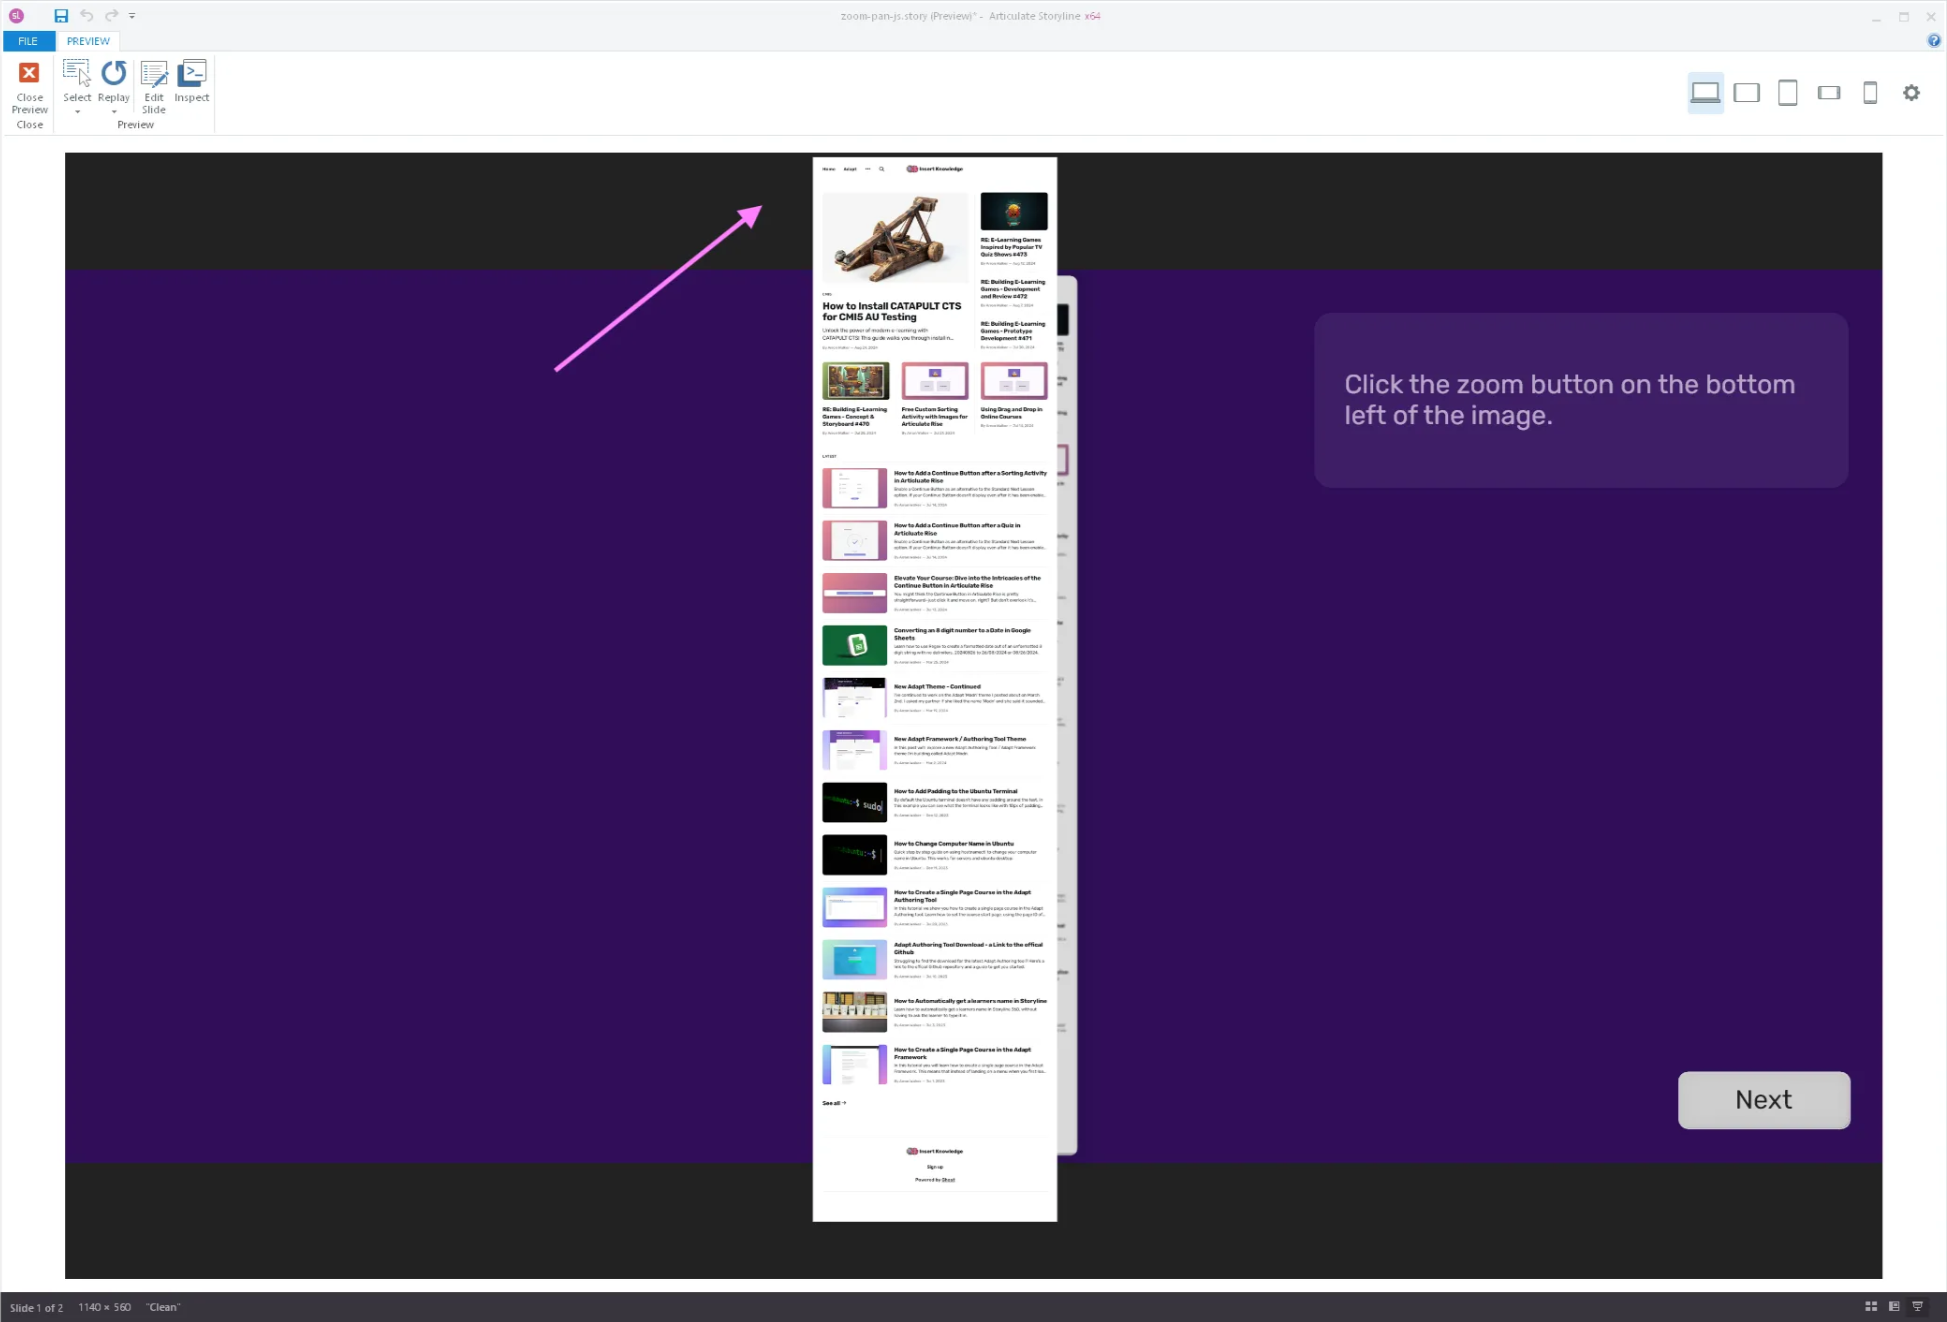
I recently built an eLearning course where I needed to display large portrait images, screenshots of emails we send to our customers. Since emails are typically scrollable documents, the screenshots ended up being quite long.
The built-in zoom feature for images is limited to the courses boundaries, so with such long screenshots, zooming barely makes a difference.
Using Storyline’s advanced JavaScript API
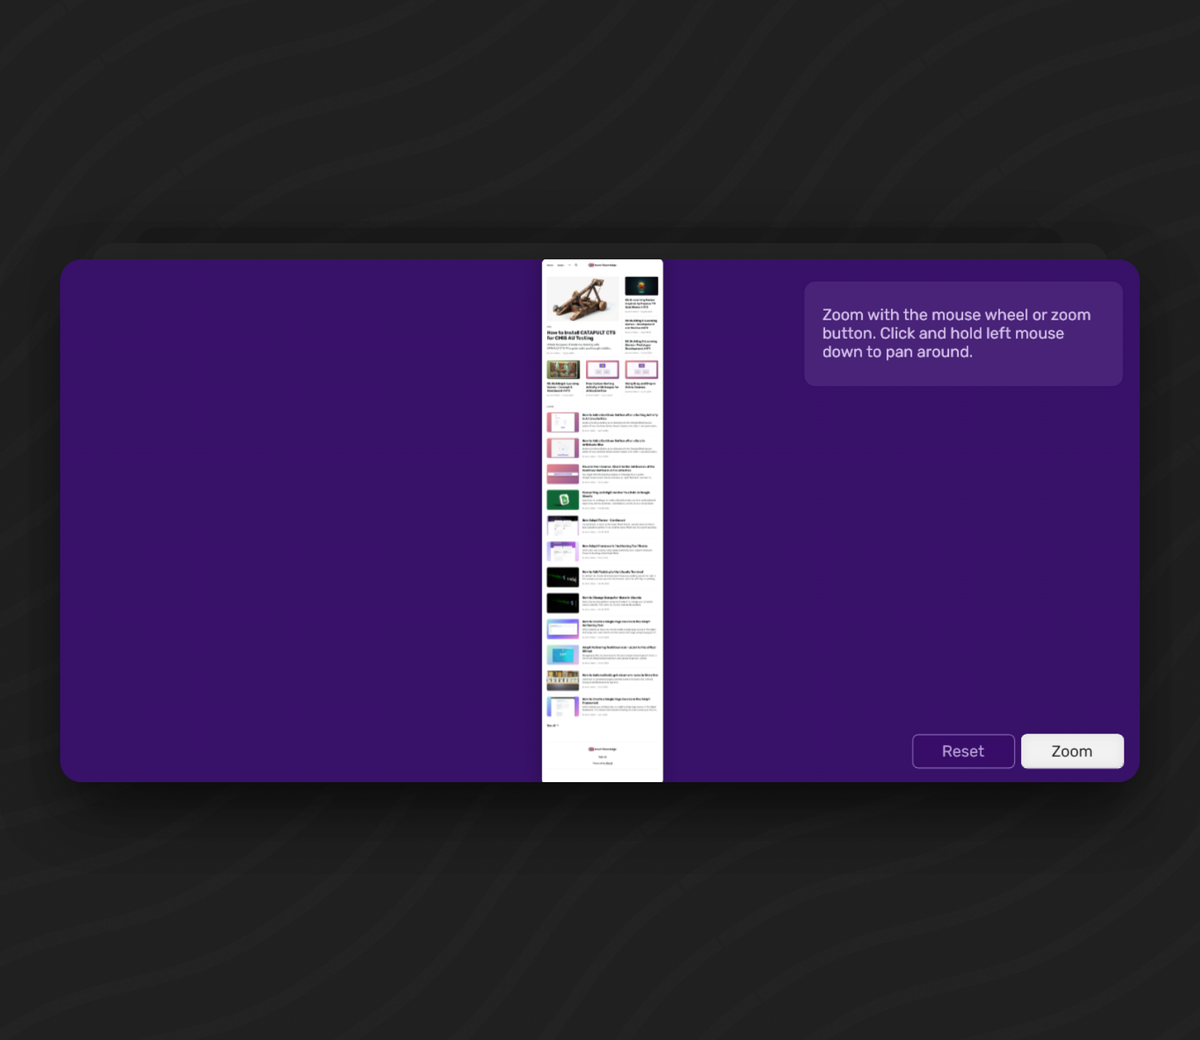
Using the new JavaScript API, I created a more intuitive interaction. Users can zoom in and out using the scroll wheel and pan around the image freely. The image isn't constrained by the course's aspect ratio, allowing it to extend beyond the usual boundaries.
Video demo of pan and zoom interaction built with Storyline JavaScript API
How to use the JavaScript API to create a pan and zoom
Initial Setup & Referencing Your Image
The first thing we need to do is get ID of the picture object from Storyline so that we can target it in JavaScript. We can do this easily by inserting the image object using the add button at the top of the JavaScript input box which is displayed when you use a JavaScript trigger.

Now we have the following code snippet:
const picture1 = object('6ESJnaJjHHc');
Other variables to setup. We’ll get into how these work later.
// Setup variables
let isDragging = false;
let startX;
let startY;
let offsetX;
let offsetY;
Guard clause
This if check stops the code from running if the object you’re targeting isn’t found.
if (!picture1) { // Guard clause, prevent's the script running if the object isn't found.
    console.error('Picture1 not found, please check object id or insert new picture1 object using the built in Storyline tools.');
}
Adding the code for the Zoom interaction
We'll add an event listener that detects mouse wheel movement and triggers a function. This function updates the picture's scale size on both the X and Y axes based on the vertical scroll amount (deltaY) from the mouse wheel. This change in scale creates the zoom-in or zoom-out effect.
// Add the event listener for scrolling zoom.
document.addEventListener('wheel', function (event) {
    const delta = event.deltaY;
    const invertedDelta = delta * -1; // invert scroll direction for zoom

    picture1.scaleX += invertedDelta * 0.1;
    picture1.scaleY += invertedDelta * 0.1;
});
Adding the drag and pan interaction
Next, we need to configure the interactions for when users press down the mouse button, move the mouse, and release the mouse button. Let’s refer to these as event handlers.
Handling the mouse down event
Here we check if the left mouse button is pressed, if it is we check the offset of the mouse click relative to the images current position. When our function first runs the startX and StartY position is 0. Calculating this on mouse down prevents the click causing the image to jump.
function handleMouseDown(event) {
    if (event.buttons === 1) { // if left mouse is pressed
        isDragging = true;

        // Calculate the offset of the mouse click relative to the image's current position. (prevents the image jumping to the initial 0 offset when you first drag)
        startX = event.clientX - picture1.x;
        startY = event.clientY - picture1.y;

        picture1.cursor = 'grab'; // Changes the mouse pointer to a 'hand' to indicate drag to the user
    }
}
Handling what happens when the mouse is moved
By knowing this offset, when the mouse moves (handleMouseMove), we can position the image so that the original clicked point on the image stays directly under the mouse cursor. This creates a natural, "grab-and-drag" feel, as if the user is physically holding that specific spot on the image.
function handleMouseMove(event) {
    if (!isDragging) return; // if we're not currently dragging return

    offsetX = event.clientX - startX;
    offsetY = event.clientY - startY;

    picture1.x = offsetX; // updates the picture position to match the mouse
    picture1.y = offsetY;

}
Cleaning up when we release the mouse button and stop dragging
function handleMouseUp() {
    isDragging = false;
    picture1.cursor = 'default';
}
Adding the event listeners for Mouse Down, Mouse Up and Mouse Move
Finally, we need to add event listeners that will trigger our functions when specific mouse events occur.
// Add event listeners for drag interaction
document.addEventListener('mousedown', handleMouseDown);
document.addEventListener('mouseup', handleMouseUp);
document.addEventListener('mousemove', handleMouseMove);
Bringing it all together
Here’s the final script which can be copy and pasted into an ‘Execute JavaScript’ trigger.
// Insert your picture file with the built in object reference or
// add the object id. The script expects the picture1 obj to exist.

const picture1 = object('6ESJnaJjHHc');

if (!picture1) { // Guard clause, prevent's the script running if the object isn't found.
    console.error('Picture1 not found, please check object id or insert new picture1 object using the built in Storyline tools.');
}

// Setup variables
let isDragging = false;
let startX;
let startY;
let offsetX;
let offsetY;

// Add the event listener for scrolling zoom.
document.addEventListener('wheel', function (event) {
    const delta = event.deltaY;
    const invertedDelta = delta * -1; // invert scroll for zoom

    picture1.scaleX += invertedDelta * 0.1;
    picture1.scaleY += invertedDelta * 0.1;
});

// Event handlers
function handleMouseDown(event) {
    if (event.buttons === 1) { // if left mouse is pressed
        isDragging = true;

        // Calculate the offset of the mouse click relative to the image's current position. (prevents the image jumping to the initial 0 offset when you first drag)
        startX = event.clientX - picture1.x;
        startY = event.clientY - picture1.y;

        picture1.cursor = 'grab'; // Changes the mouse pointer to a 'hand' to indicate drag to the user
    }
}

function handleMouseUp() {
    isDragging = false;
    picture1.cursor = 'default';
}

function handleMouseMove(event) {
    if (!isDragging) return; // if we're not currently dragging return

    offsetX = event.clientX - startX;
    offsetY = event.clientY - startY;

    picture1.x = offsetX; // updates the picture position to match the mouse
    picture1.y = offsetY;

}

// Add event listeners for drag interaction
document.addEventListener('mousedown', handleMouseDown);
document.addEventListener('mouseup', handleMouseUp);
document.addEventListener('mousemove', handleMouseMove);